
To create an event website you need a domain, hosting, and one page that answers three questions: what the event is, when and where it happens, and how to register. That much can be live in an afternoon. Publish it as soon as you have a date, then add the schedule and detail as they firm up.
Most event sites fail in the same two ways: they launch too late to help with the announcement, or they were never checked on a phone. Neither is a design problem. Both are sequencing problems.
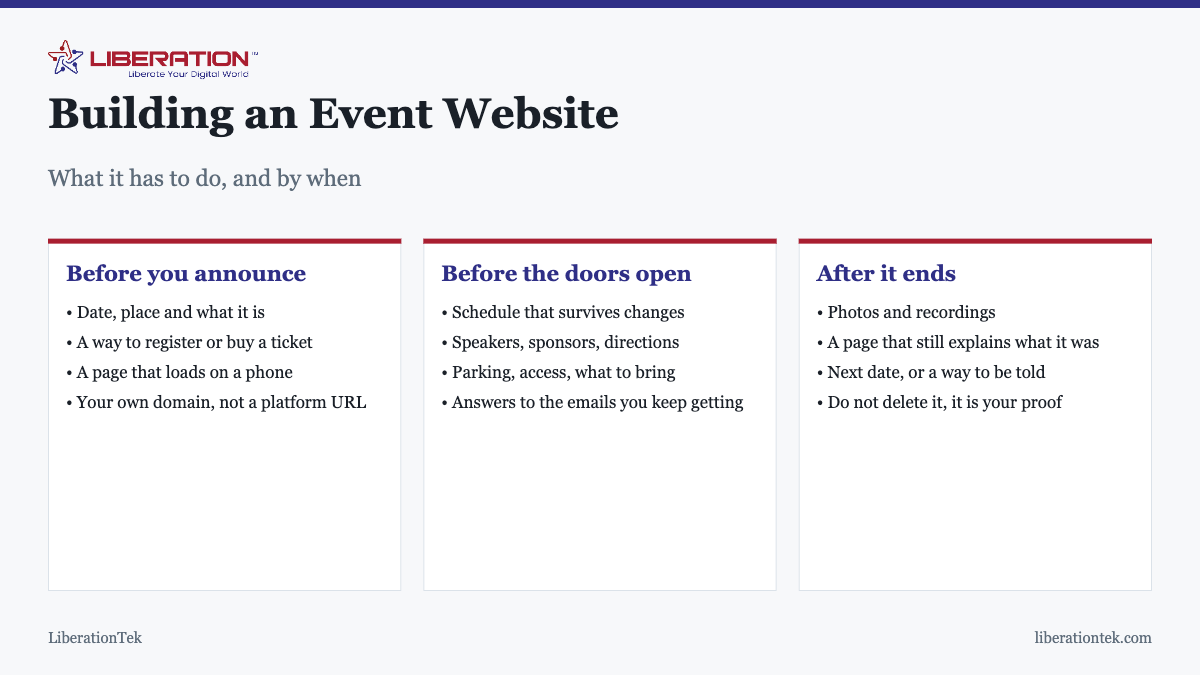
Start with the minimum, and publish early
The most common mistake is waiting until the schedule, speakers and pricing are all confirmed before putting anything online. By then the announcement has already gone out and there was nowhere to send people.
The moment you have a date and a venue, publish a single page with:
- What the event is, in one sentence anyone can understand.
- The date and time, with the time zone if anyone might be remote.
- Where, with a real address or a note that the joining link follows.
- What it costs, or “free”, or “pricing announced shortly”.
- One clear next step: register, buy a ticket, or leave an email address to be told when registration opens.
That page can go live the day you book the venue. Everything after this is refinement.
Your own domain, not a platform URL
Ticketing platforms and social events give you a URL on their domain. Useful for selling, but not a substitute for a page you control.
An address at your own domain can be read aloud, printed on a flyer, and typed correctly from memory. It also keeps the search history: if the event recurs, the same page accumulates credibility year after year instead of starting fresh on someone else’s platform each time.
A domain is roughly $15 a year and shared hosting is $7.99 a month with free SSL and room for up to nine sites, so a second site for an event is not a meaningful expense. Whether you need one is a different question.
Separate site, or a page on your existing one?
| Situation | Better choice | Why |
|---|---|---|
| One-off event | A page on your existing site | Inherits your domain’s credibility and index history |
| Annual or recurring | Its own site or subdomain | Builds its own audience and archive over time |
| Event is the business | Its own site | It is the product, not a side page |
| Several events a year | One site, a page per event | Avoids maintaining many small sites |
| Ticket sales are the point | Own site plus a ticketing integration | Control the page, delegate the transaction |
Builder or WordPress?
Both work. The deciding factor is whether the event repeats.
A website builder at $10.99 a month, with hosting and SSL included, is the faster route for a one-off. You will have something presentable in an evening and nobody has to maintain it afterwards.
WordPress earns its keep on a recurring event, where you will accumulate several years of archives, may need particular registration or ticketing behavior, and want full control over the content. The trade-off is that updates and backups become yours, which is covered in WordPress hosting requirements.
One practical note either way: whichever platform you choose, make sure the person who will be updating the site during the week of the event can actually log in and edit it from a phone. Schedules change late, and the person fixing it is rarely sitting at a desk.
What to add before the doors open
Once the basics are live, these are what attendees actually look for, roughly in the order they ask:
- The schedule. Expect it to change. Build it so editing one session does not mean rebuilding the page.
- Directions and parking. The single most-viewed page on the morning of any in-person event.
- Accessibility information. Step-free access, hearing loops, quiet spaces. People who need this will not attend without knowing.
- Speakers or performers, with a line on why each is worth seeing.
- Sponsors, if you have them, with links. Frequently part of what you sold them.
- What to bring, what is provided, and the dress code if there is one.
- A frequently asked questions section, built from the emails you are already receiving. If three people have asked, put it on the site.
The three things that actually go wrong
It does not work on a phone
Most people will open your event site on a phone, often standing outside the venue looking for the entrance. Check it on a real phone on mobile data, not just a narrow browser window on your desk. The map, the schedule and the registration button are what matter.
Registration breaks on announcement day
Announcement day is the one predictable traffic spike an event site gets, and it is the worst possible moment for the registration flow to fail. Complete a real test registration end to end, including the confirmation email, before you announce. If you expect real volume, make sure your hosting can take a burst; managed VPS hosting exists for exactly this kind of peak.
The site disappears afterwards
Taking the site down after the event destroys the proof that it happened, along with whatever search equity it built. For a recurring event this is genuinely costly, because next year’s attendees want to see what last year looked like.
Keep it up, and make it work afterwards
After the event, spend twenty minutes turning the site into an archive rather than deleting it:
- Add photos and any recordings. This is the most persuasive material you will ever have for the next one.
- Change the tense so a visitor immediately understands the event has happened.
- Announce the next date, or offer a way to be notified.
- Thank sponsors and speakers, and keep their links live.
- Keep the page at the same address. Links printed on programs and shared in posts will keep arriving for years.
If you would rather hand the build over, our web development team builds event sites on hosting we run ourselves, and you keep ownership of the site and its accounts either way.
Planning an Events Website Around Your Calendar
An events website works best when it follows the calendar. Decide what visitors need at each stage, and build only that. A good events website changes shape as the date gets closer, so plan for three phases.

- Announce: name, date, place and a way to be told when more is known.
- Register: a simple form or ticket link, with confirmation emails that actually arrive.
- Event day: directions, parking, the schedule and a contact number that someone answers.
- After: photos, thanks and a signup for next year, so the events website keeps working for you.
Keeping each phase small makes the events website easier to finish. If you run several events, one events website with a page for each is easier to maintain than a new site every time. Our notes on website builders and WordPress hosting will help you choose how to build it.
Making Your Events Website Easy for Everyone to Use
People reach an events website on phones, in a hurry, often while standing in line. Large buttons, short pages and readable text matter more than design flourishes. The W3C explains the basics in its introduction to web accessibility, and an accessible events website is easier for everyone to use, including older visitors and people with disabilities.

- Test the events website on a real phone before you share the link.
- Put the date, place and registration button at the top of the home page.
- Use real text for details, not only an image of a flyer.
- Add descriptions to images so screen readers can read them.
- Send yourself a test registration and confirm the email arrives.
Public bodies and some organisations have accessibility obligations, covered in our post on the ADA Title II deadline. That is general information, not legal advice. Whatever your size, a clear events website with fast pages and a working registration form serves your guests better than a clever one. Hosting also matters on announcement day, when traffic spikes, so see our shared web hosting and VPS web hosting options. LiberationTek offers 15% off for churches and nonprofits that run an events website for their community.
Frequently asked questions
How do I create an event website?
Register a domain, put it on hosting, and publish one page that answers what the event is, when and where it happens, and how to register. That minimum can be live in an afternoon. Everything else, the schedule, speakers, directions and sponsors, is added as details firm up. The mistake is waiting until everything is confirmed before publishing anything.
What should an event website include?
At minimum: what the event is, the date and time with the time zone, the venue or joining link, the price, and a working way to register. Then the schedule, directions and parking, accessibility information, and answers to the questions you are already being emailed. A single clear call to action matters more than any of the design.
Do I need a separate website for my event?
If the event is recurring or central to your business, a dedicated site or subdomain is worth it. For a one-off, a page on your existing website is usually better: it inherits your domain’s credibility and search history rather than starting from nothing, and there is no second site to maintain afterwards.
Should I use a website builder or WordPress for an event site?
A website builder is the faster route for a one-off event and handles hosting, SSL and updates for you. WordPress is the better choice for a recurring event where you will accumulate years of archives, need specific registration or ticketing behavior, or want full control of the content. Both work; the deciding factor is whether the event repeats.
How far in advance should an event website go live?
As soon as you have a date and a place, even if nothing else is settled. A single page saying what, when, where and “registration opens soon” gives you somewhere to point people from the first announcement, and gives search engines time to index it. Waiting for complete information is the most common reason event sites launch too late to help.
What usually goes wrong with event websites?
Three things: the site is not readable on a phone, which is where most people will open it; the registration link is buried or breaks under load on announcement day; and the site is taken down after the event, destroying the evidence that the event happened and any search equity it built. Test registration properly before you announce.
What should I do with the site after the event?
Keep it up. Add photos, recordings and a short summary, and either announce the next date or offer a way to be notified. An archived event page is proof the event is real and recurring, which is exactly what someone deciding whether to attend next time wants to see. Deleting it throws away everything it earned.